
Historical images
Take a look back in time along the new Metro line between Chatswood and Sydenham.
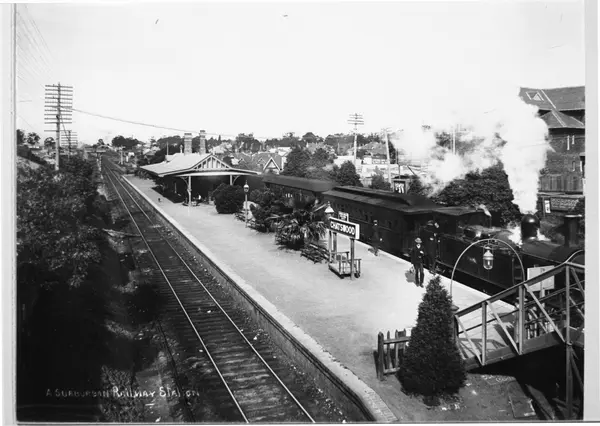
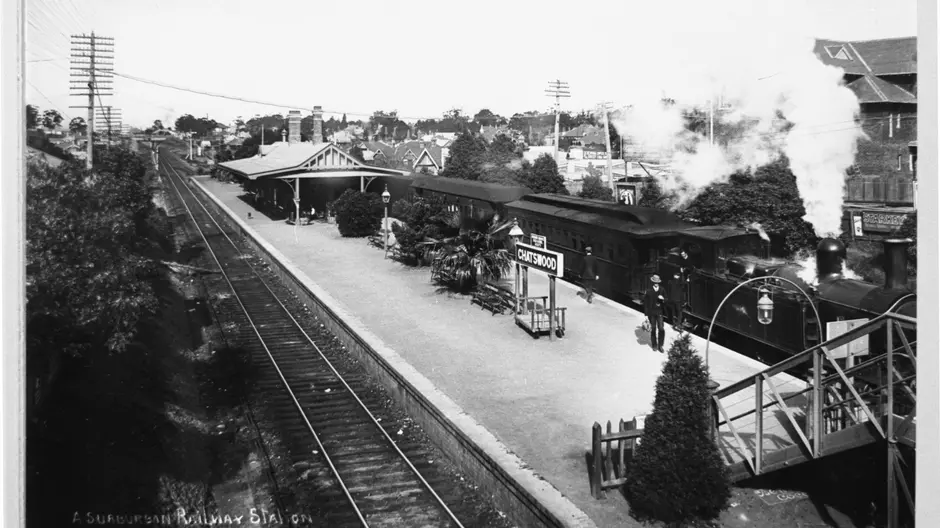
Chatswood
A steam train prepares to depart Chatswood Railway Station in 1910. Photo courtesy of Willoughby City Library Services.
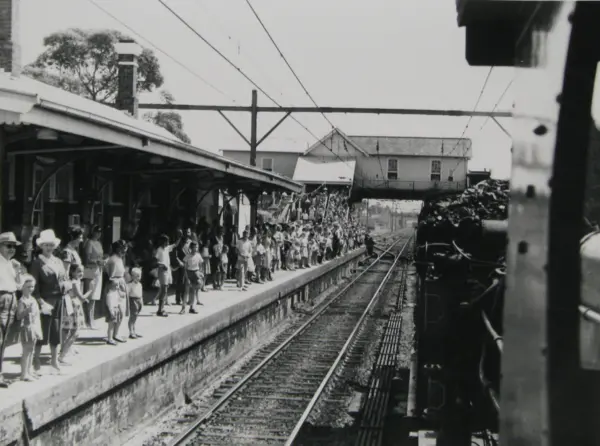
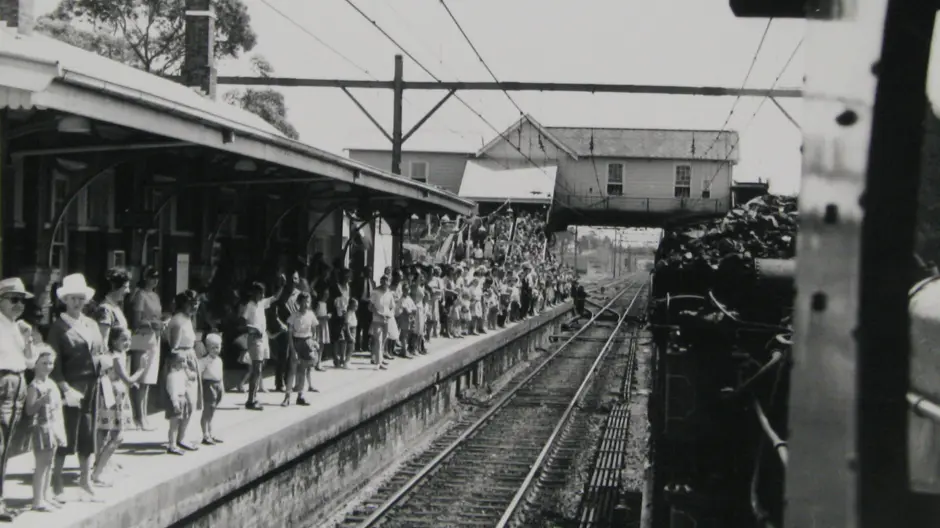
Chatswood
A steam train at Chatswood Railway Station during Willoughby Centenary celebrations in 1965. Photo courtesy of Willoughby City Library Services.
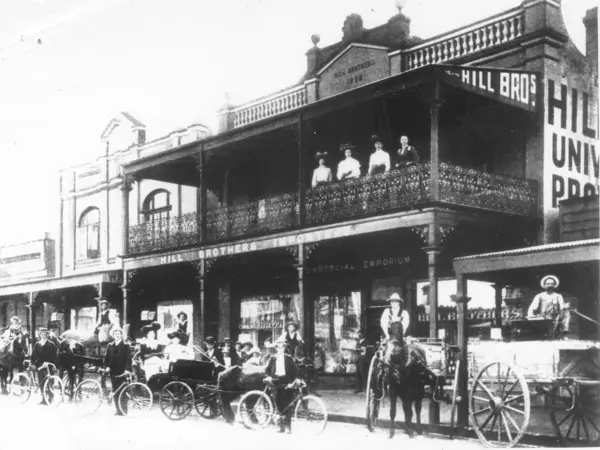
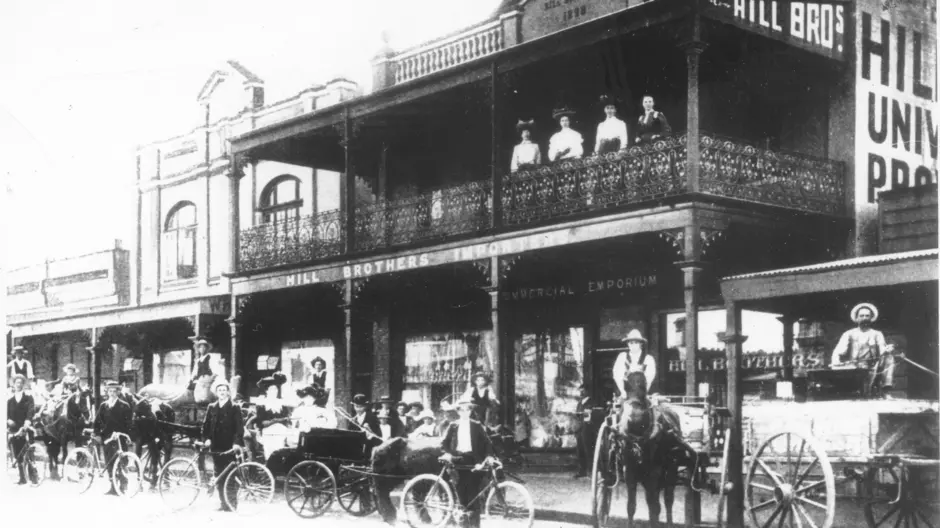
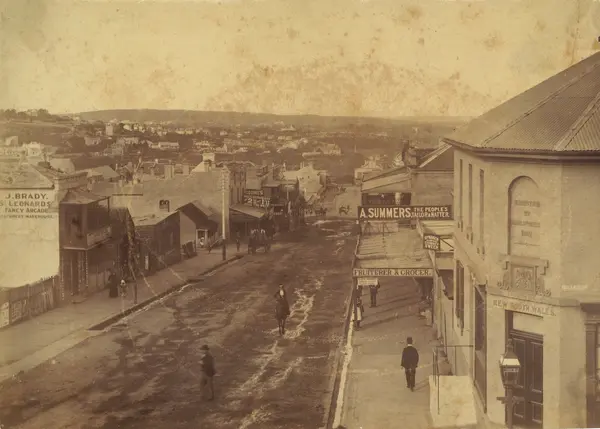
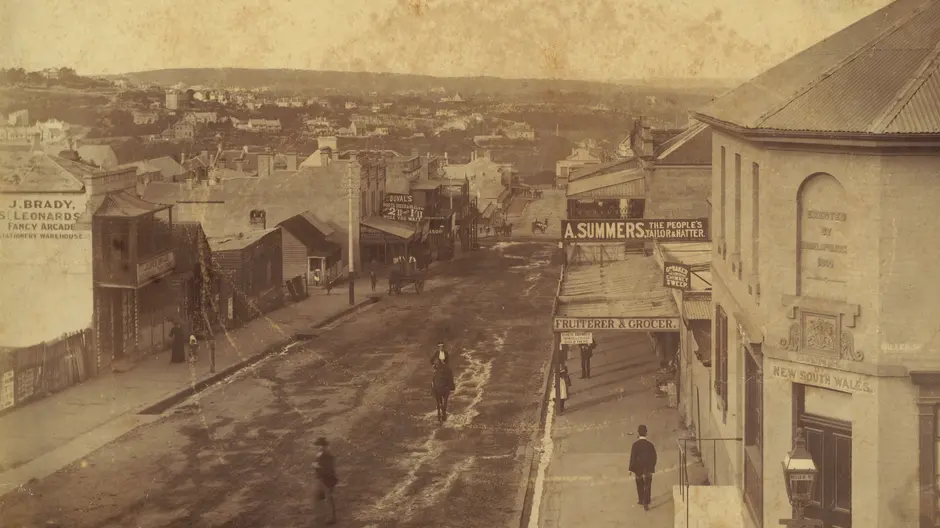
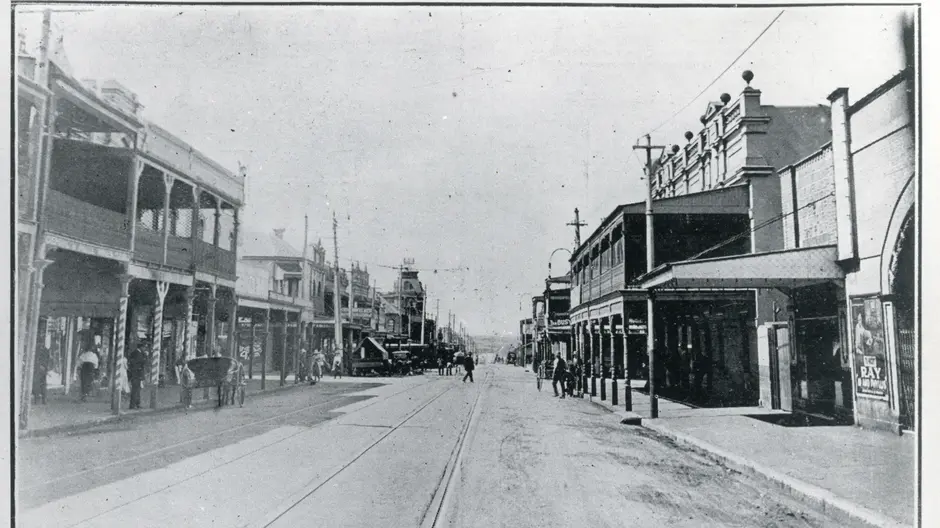
Chatswood
Horse-drawn vehicles and bicycles outside Hill Bros. Importers, Chatswood in 1904. Photo courtesy of Willoughby City Library Services.
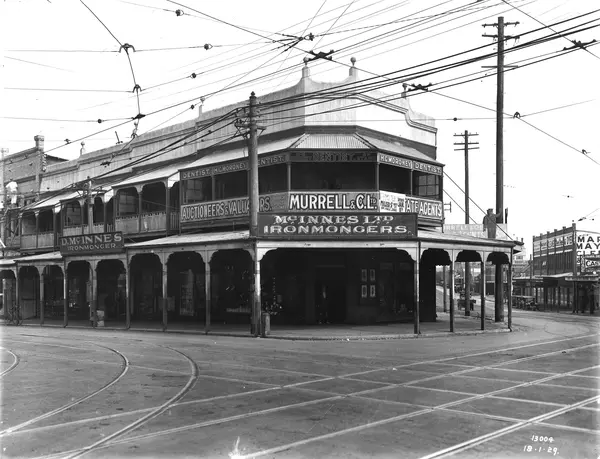
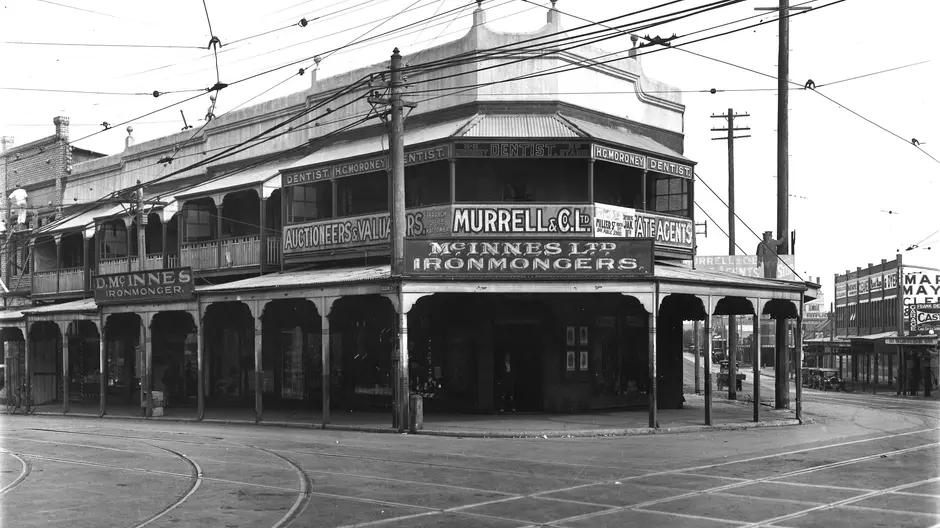
Crows Nest
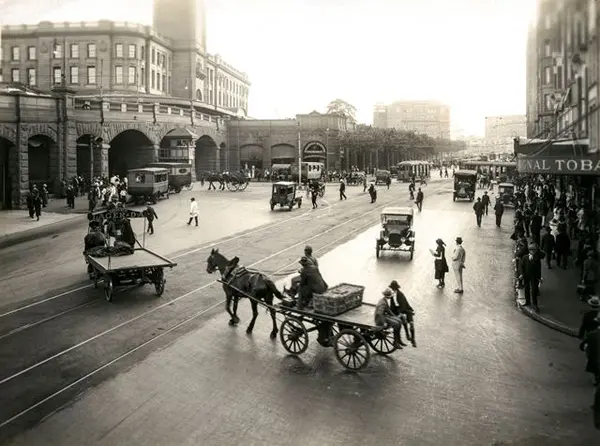
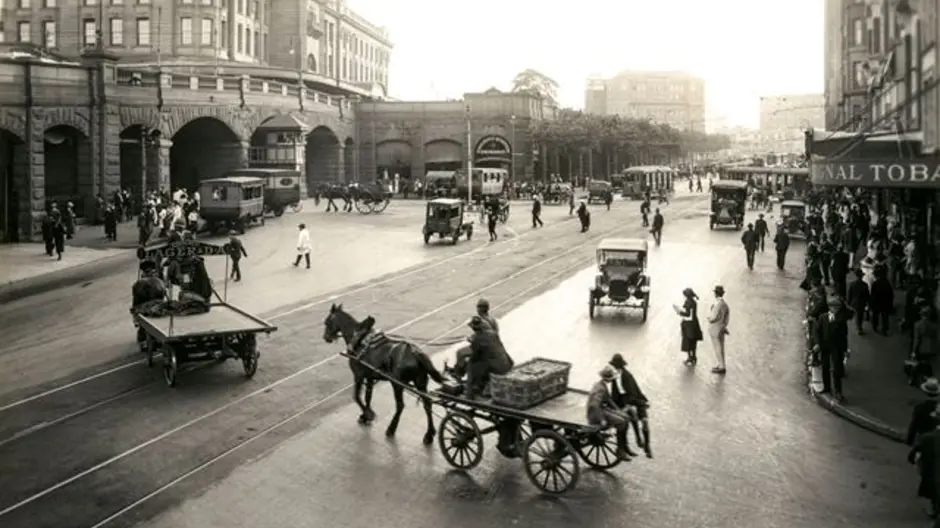
Kents Corner, Crows Nest Junction. Photo courtesy of State Library of New South Wales.
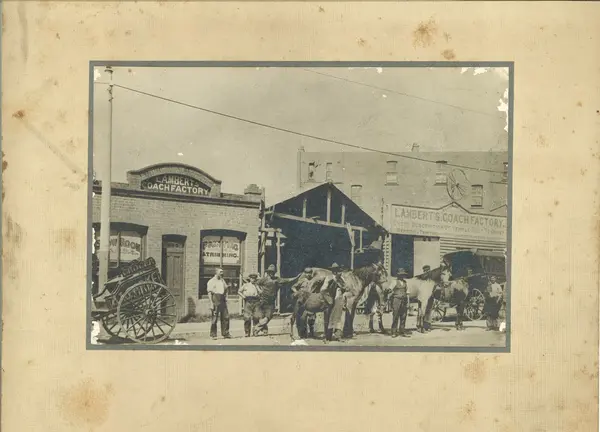
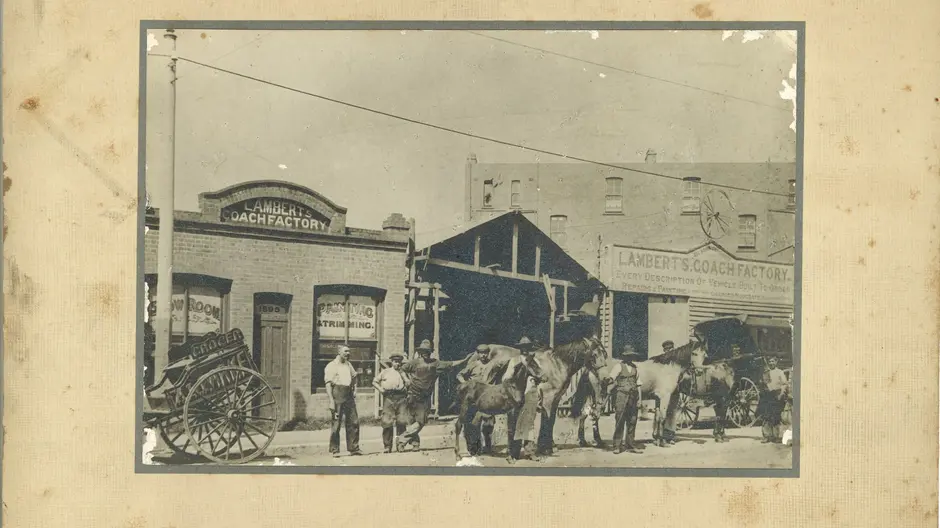
Crows Nest
Lambert’s Coach Factory, Crows Nest.
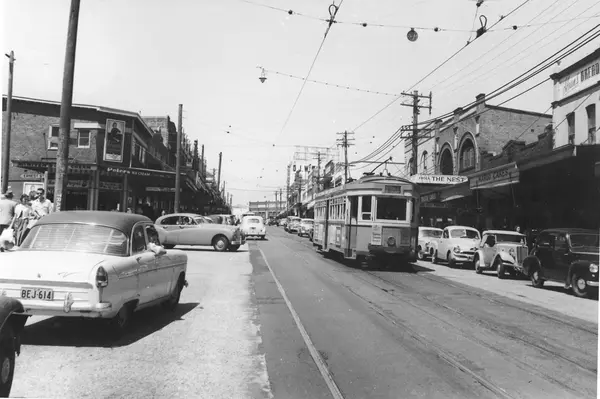
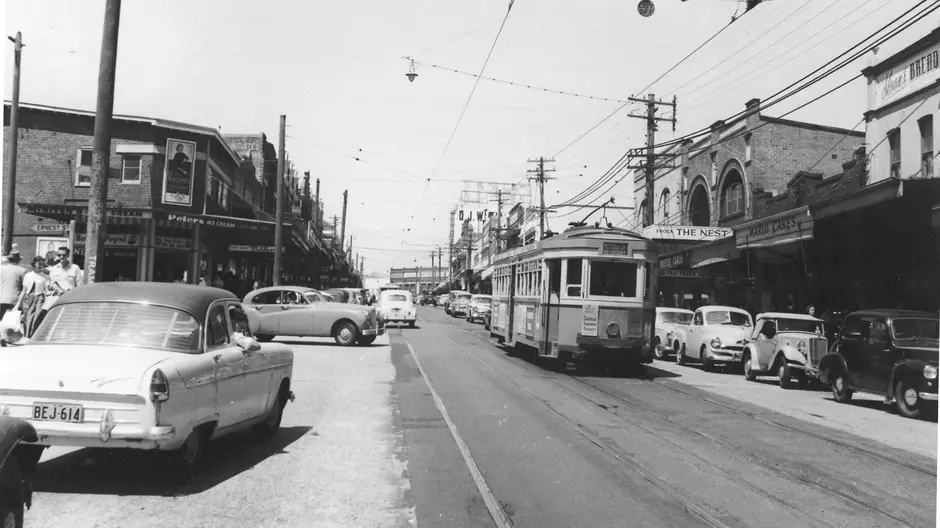
Crows Nest
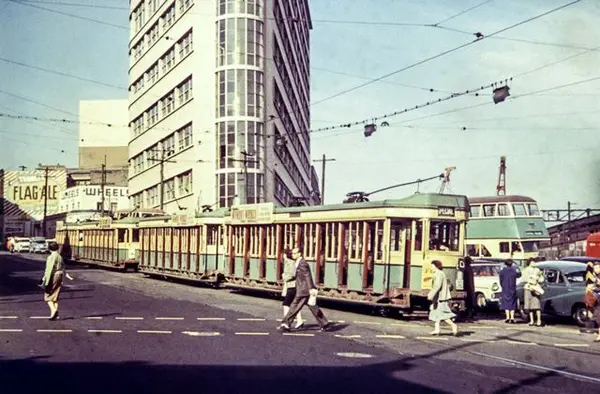
Tram travelling north along Willoughby Road, Crows Nest. Photo courtesy of Sydney Tramway Museum.
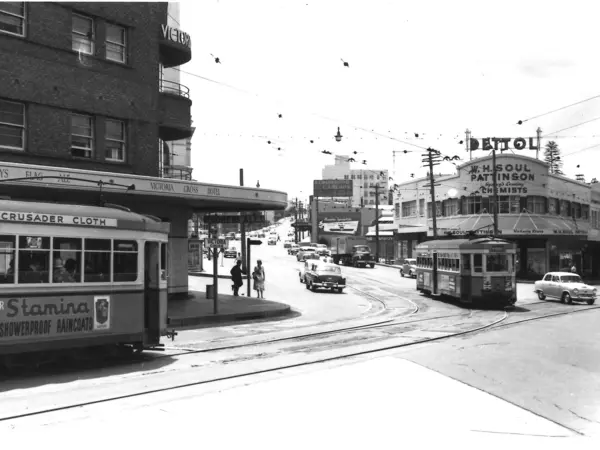
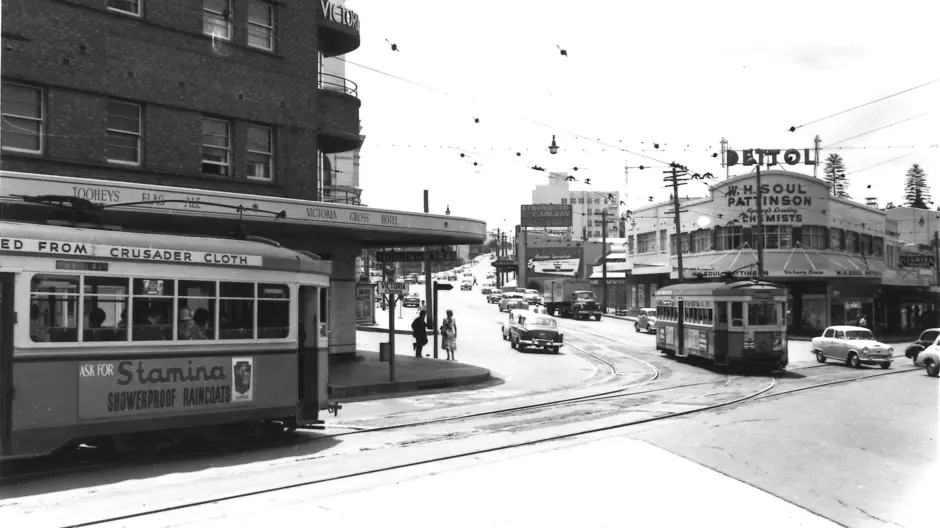
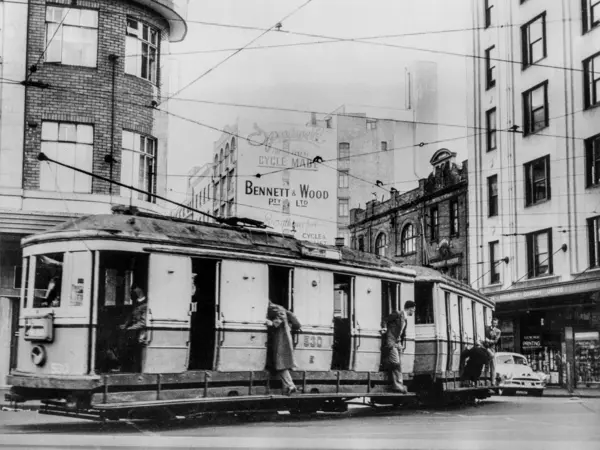
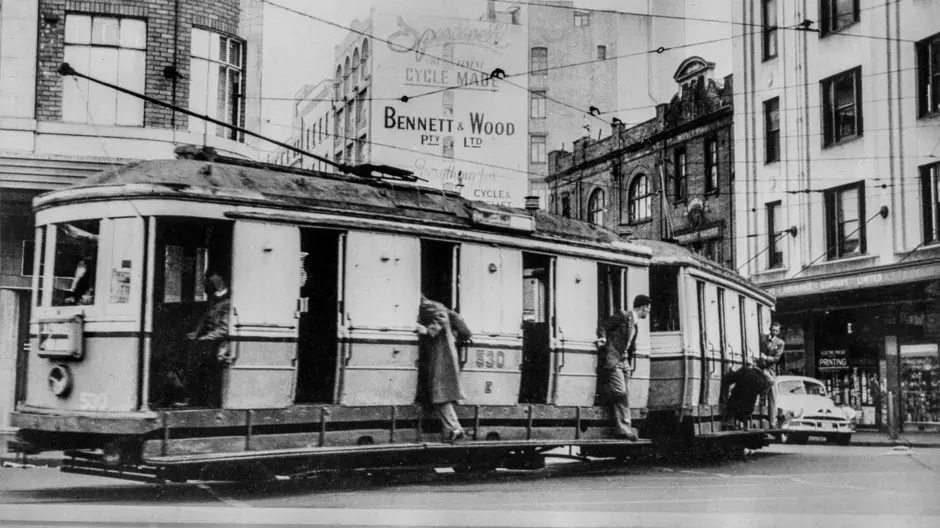
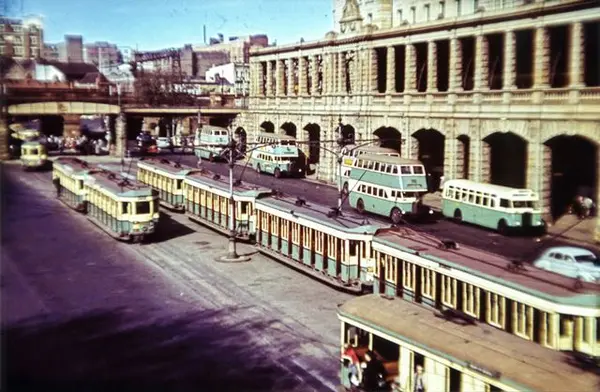
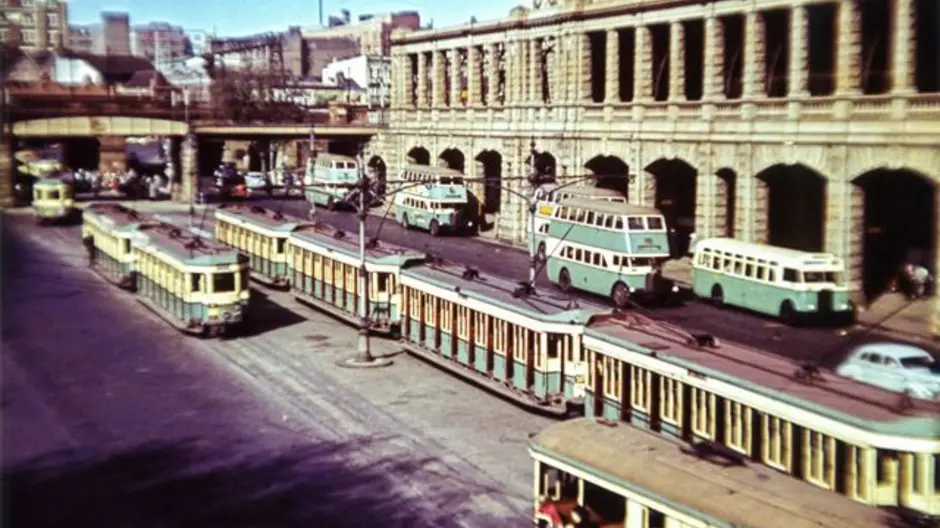
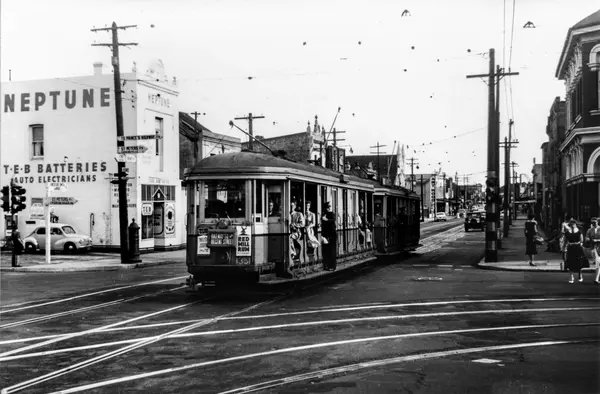
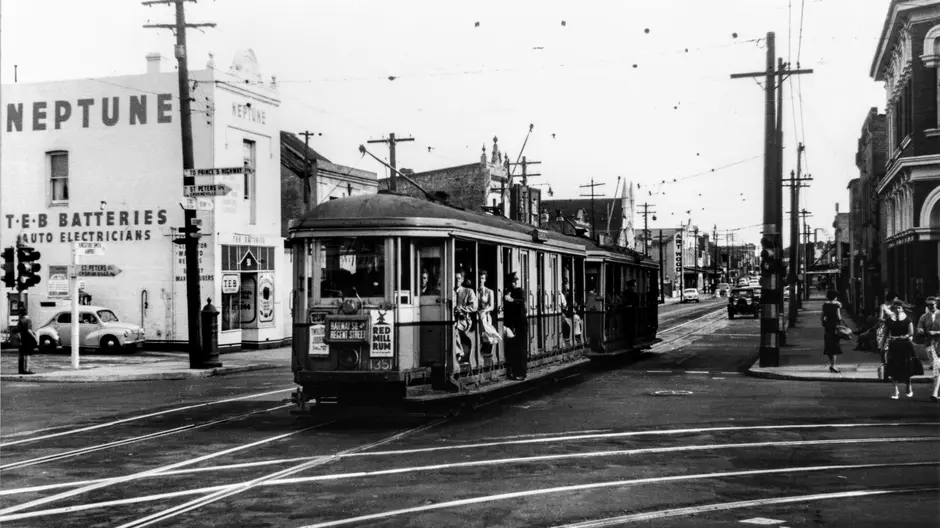
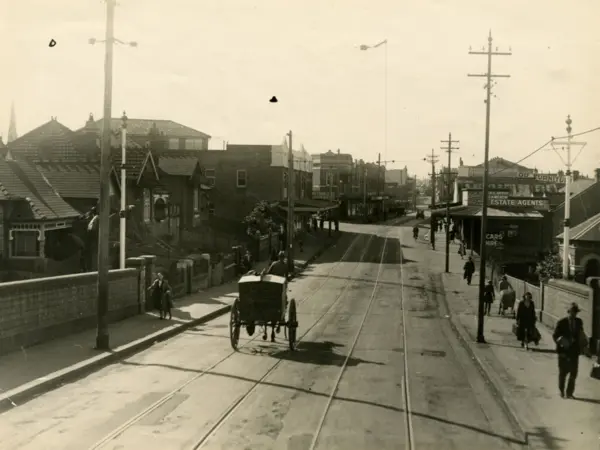
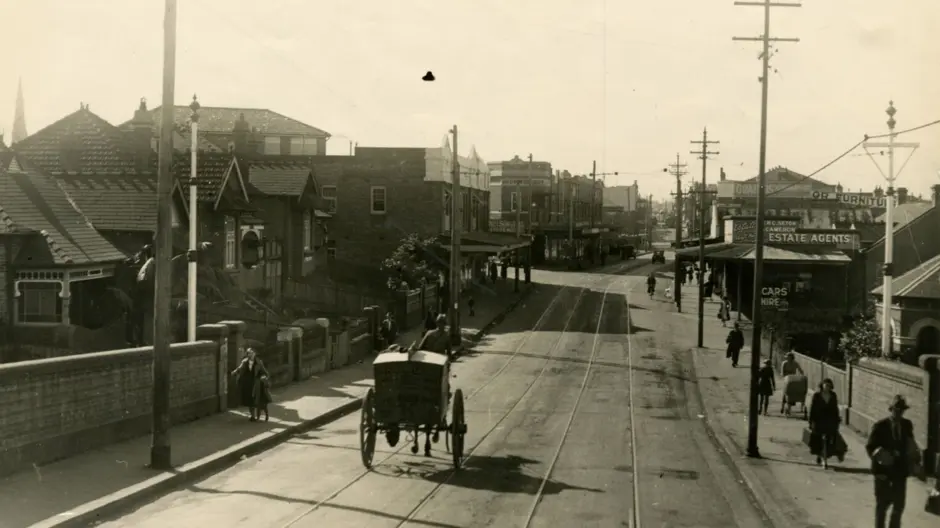
Victoria Cross
Trams and cars travelling on the Pacific Highway, North Sydney. c.1950s. Photo courtesy of the Sydney Tramway Museum.
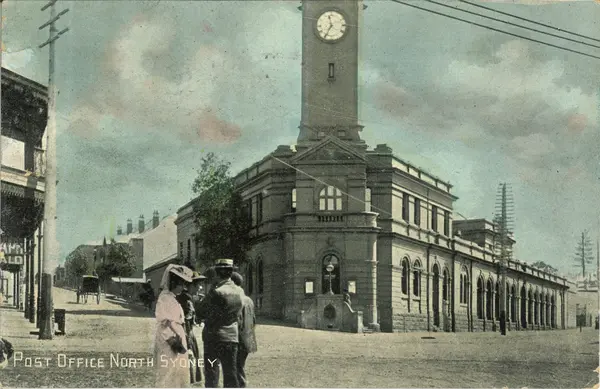
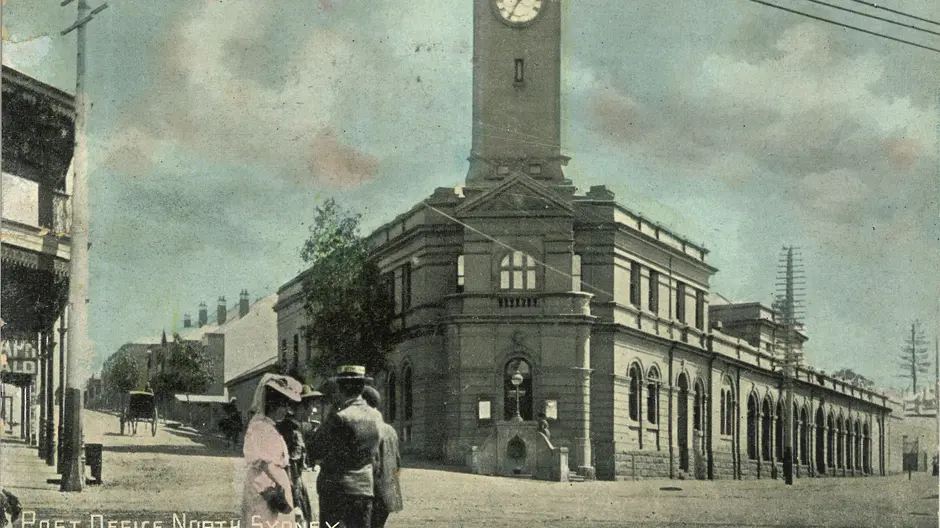
Victoria Cross
North Sydney Post Office. c.1900s - Postcard produced by Harding & Billing.
Victoria Cross
Photo courtesy of North Sydney Heritage Centre, Stanton Library.
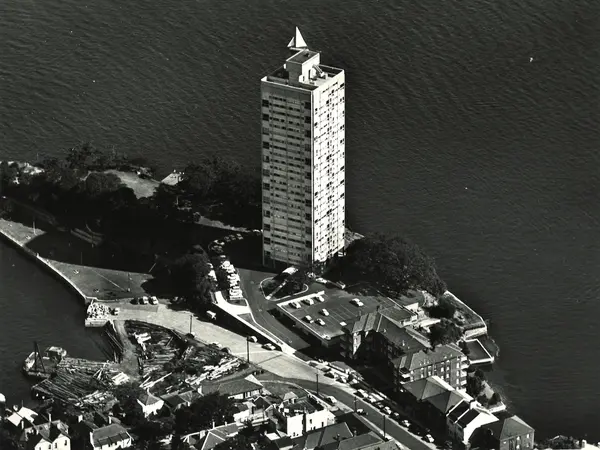
McMahons Point and Blues Point Reserve
1974. Courtesy of NSW Department of Planning & Environment.

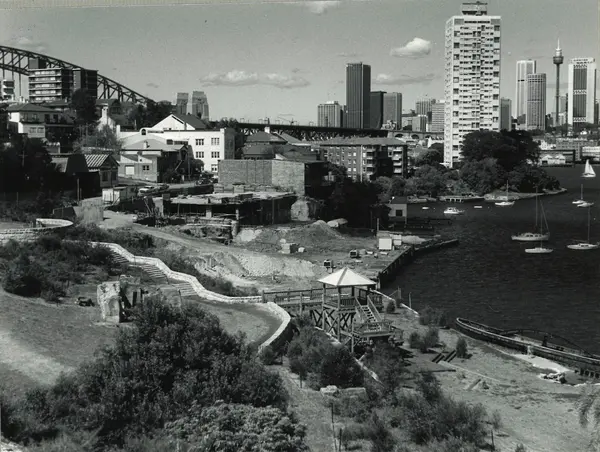
Blues Point
Sawmillers Reserve and adjacent foreshore to Blues Point, 1984. Courtesy of Kirribilli Camera Club.

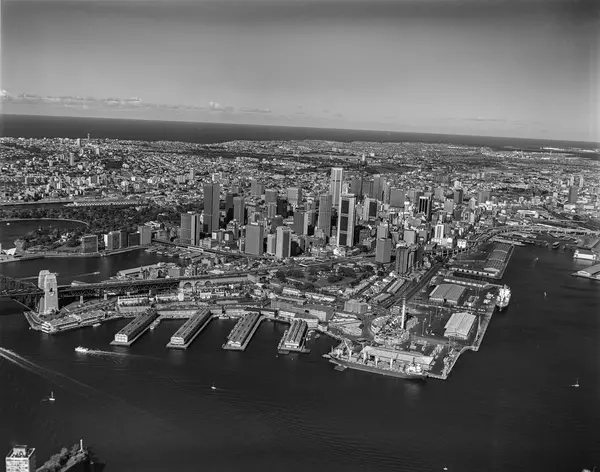
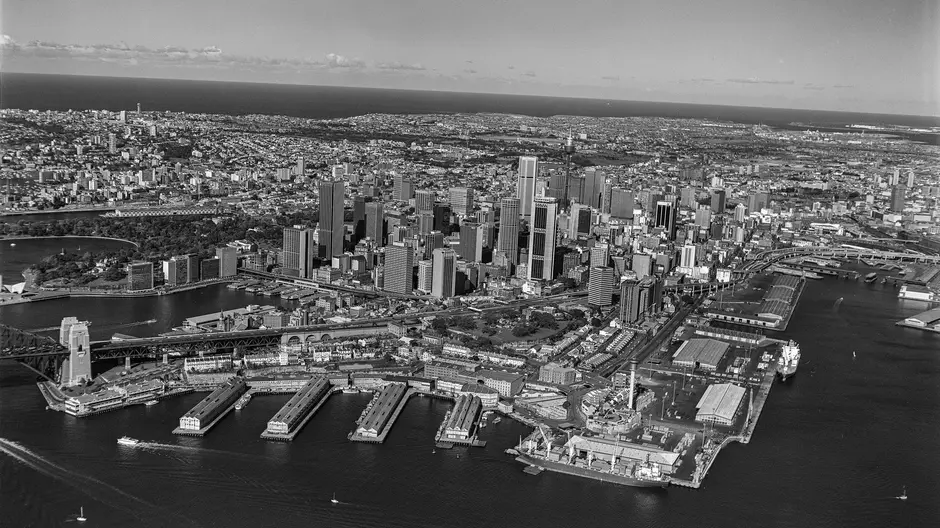
Barangaroo
Aerial photograph, 1980's. Photo courtesy of City of Sydney Archives. Ref #028603.
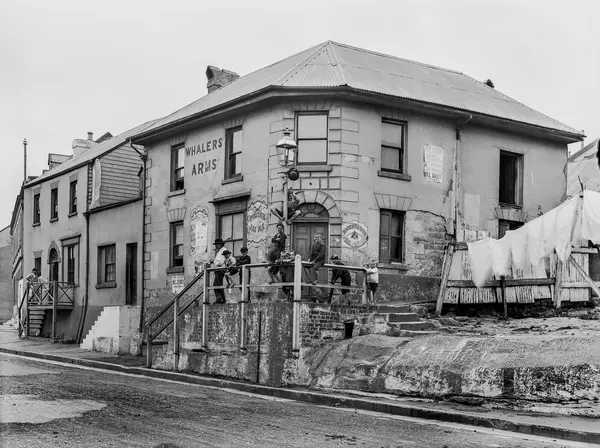
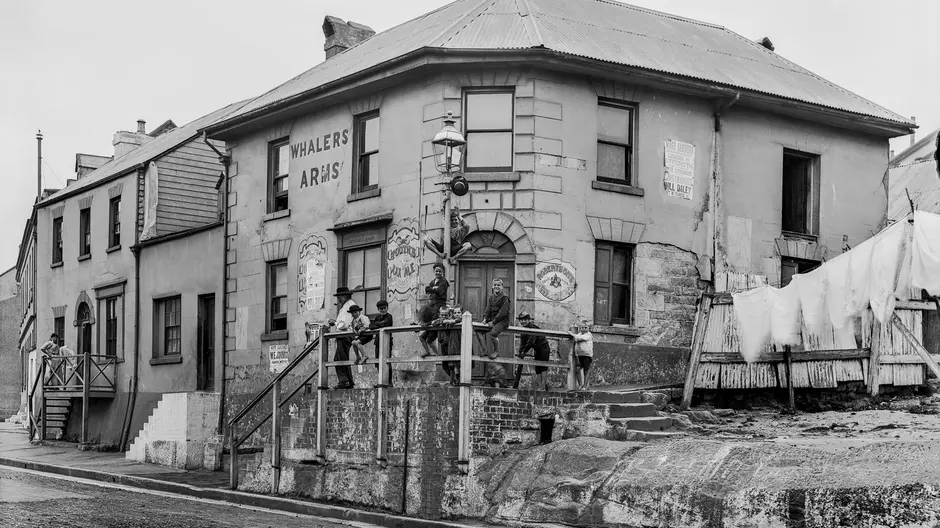
Barangaroo
Whaler's Arms Hotel, corner of Gloucester and Essex Streets, c. 1901. Photo courtesy of City of Sydney Archives. Ref #005044.
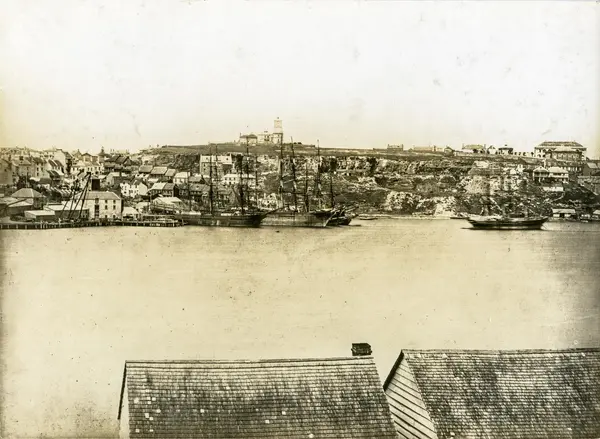
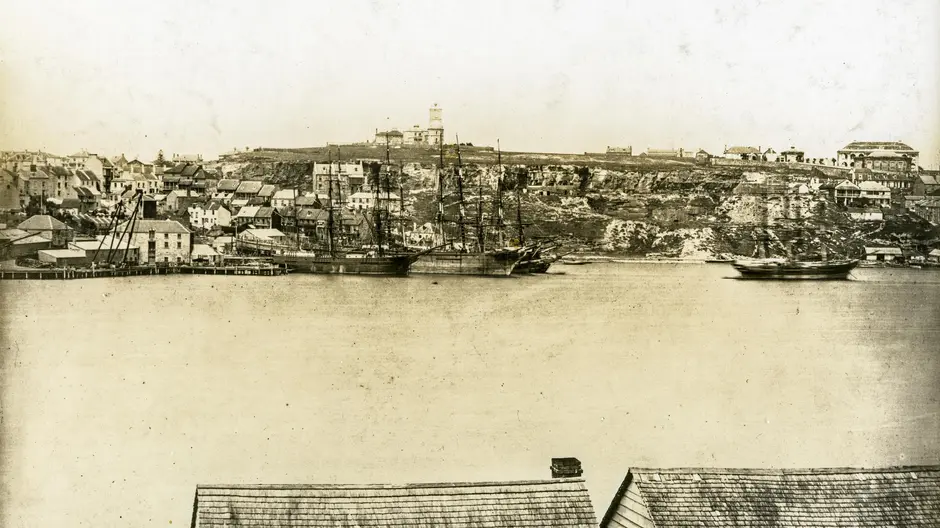
Barangaroo
Millers Point as seen from McMahons Point, c. 1870. Photo courtesy of City of Sydney Archives. Ref #081660.
Pitt Street
Customers travelling by tram, corner of Park and Pitt streets, c.1950. Photo courtesy of the City of Sydney Archives. Ref #000298
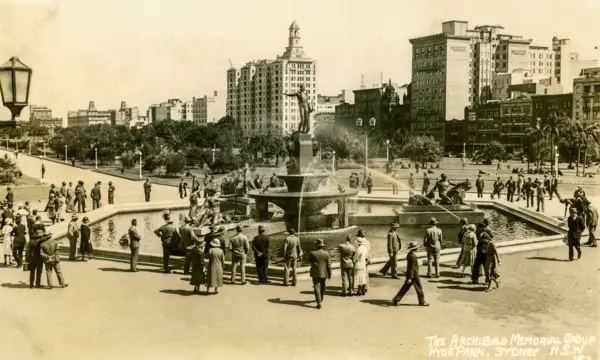
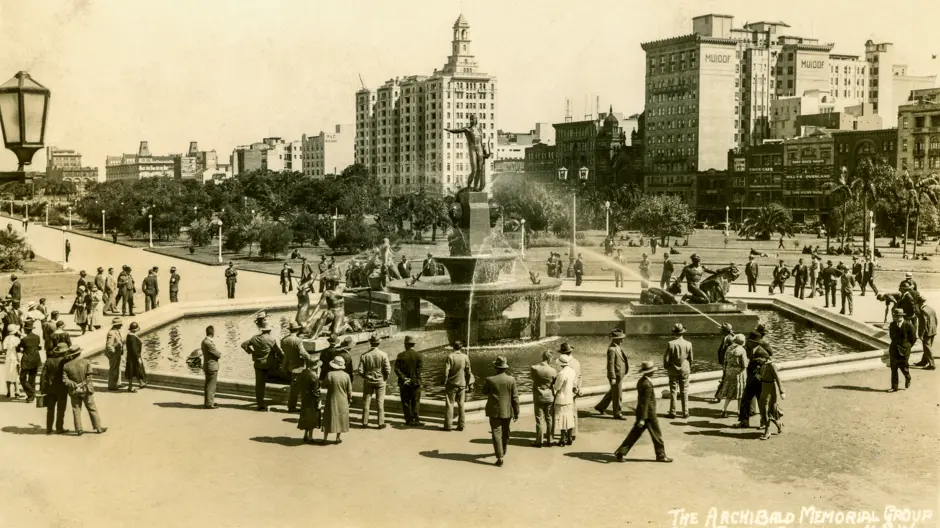
Pitt Street
People gathering at the Archibald Fountain, Hyde Park North, c.1930. Photo courtesy of the City of Sydney Archives. Ref #035723
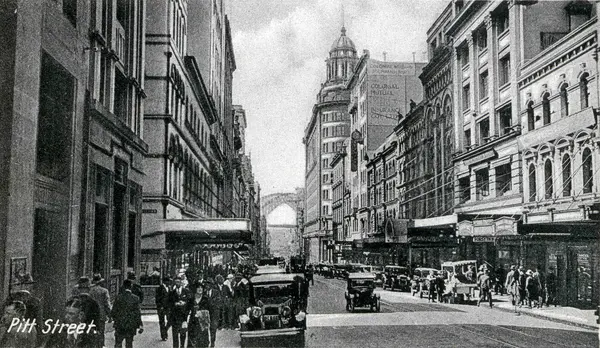
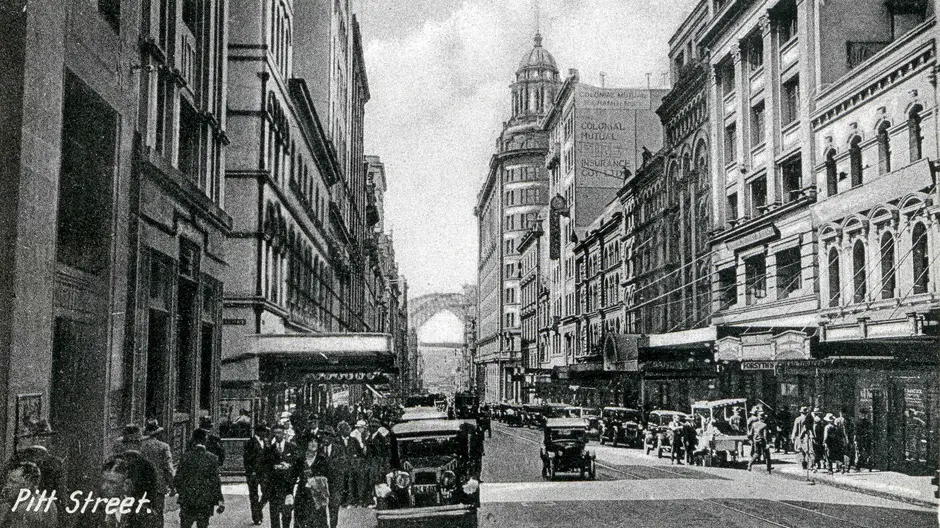
Pitt Street
A busy Pitt Street in the CBD, c.1930s. Photo courtesy of the City of Sydney Archives. Ref #059249
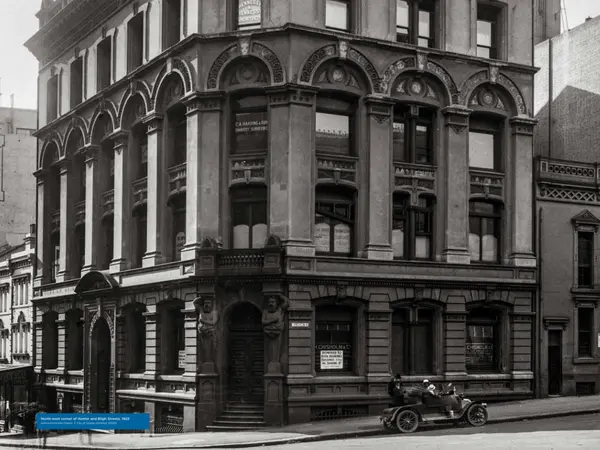
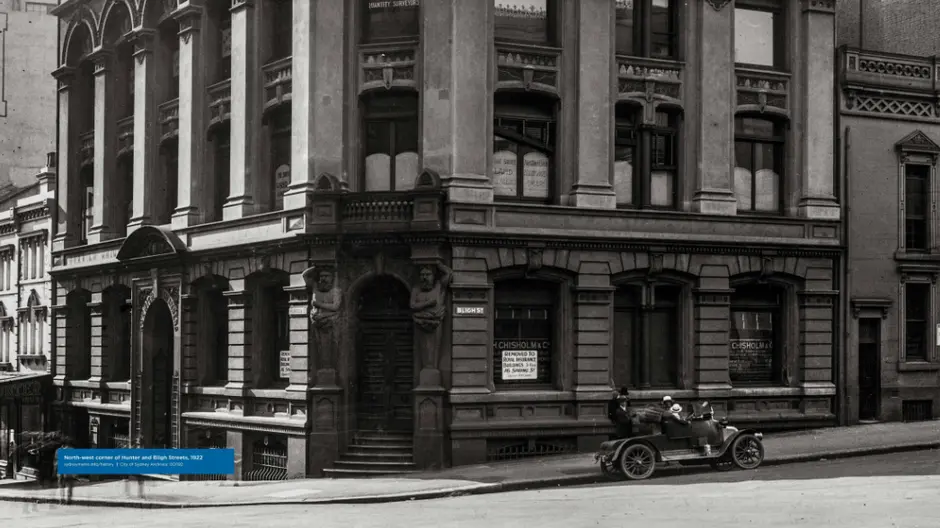
Martin Place
North-west corner of Hunter and Bligh Streets, 1922. Photo courtesy of City of Sydney Archives. Ref #001192
Martin Place
South-west corner of Hunter and Elizabeth Streets, c1907. Photo courtesy of City of Sydney Archives. Ref #000198

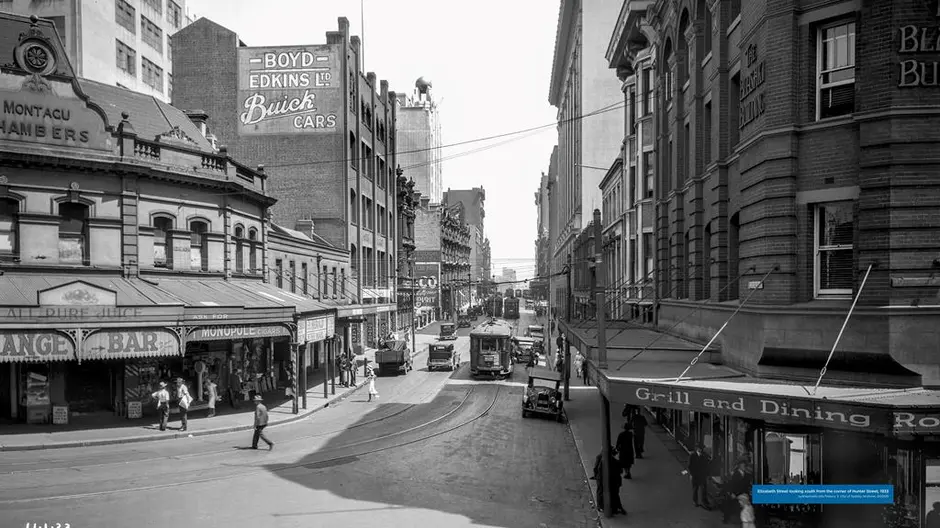
Martin Place
Elizabeth Street looking south from the corner of Hunter Street, 1933. Photo courtesy of City of Sydney Archives. Ref #005825
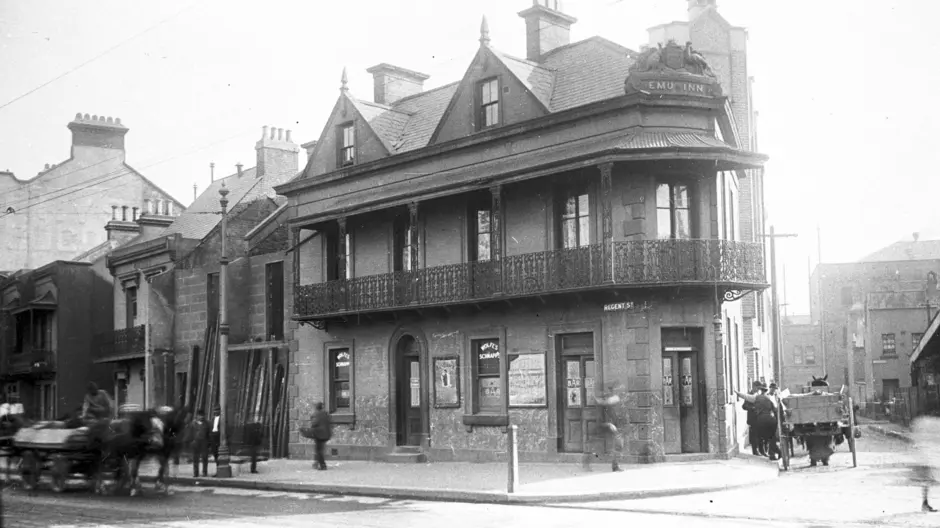
Regent Street
The Emu Inn - a two-storey sandstone and slate terrace in Chippendale, c1913.
Regent Street
Two-storey sandstone terraces on Kensington Street, Chippendale, c1909-1913.

Regent Street
A tram running along Regent Street, Chippendale in 1953.
Central
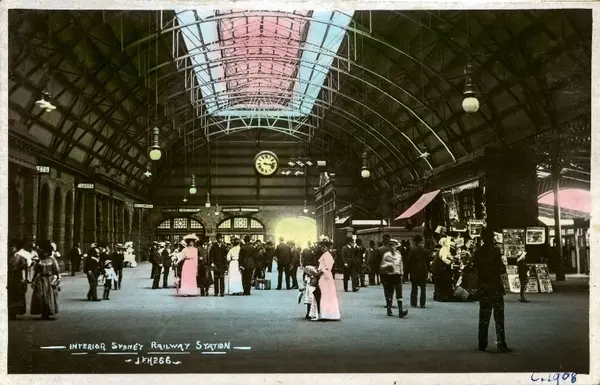
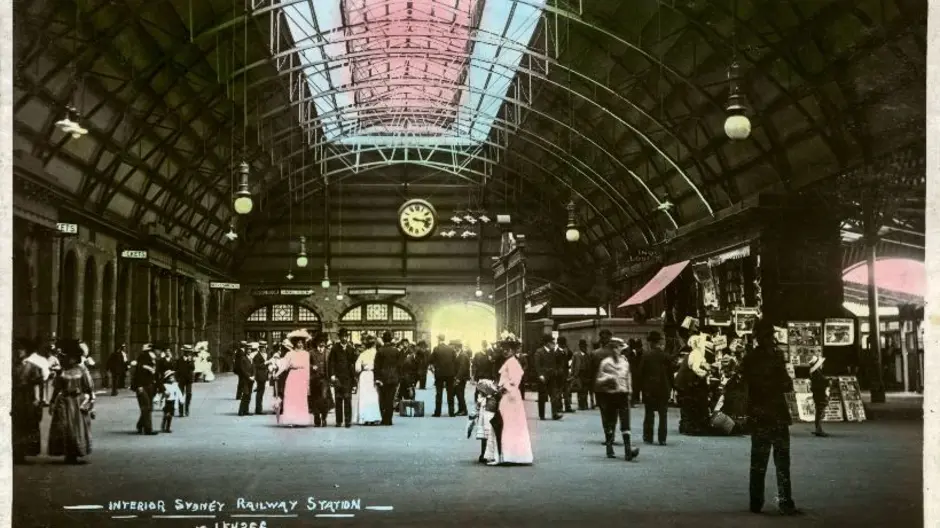
Central Station Grand Concourse, postcard, c.1908. City of Sydney Archives: 000245
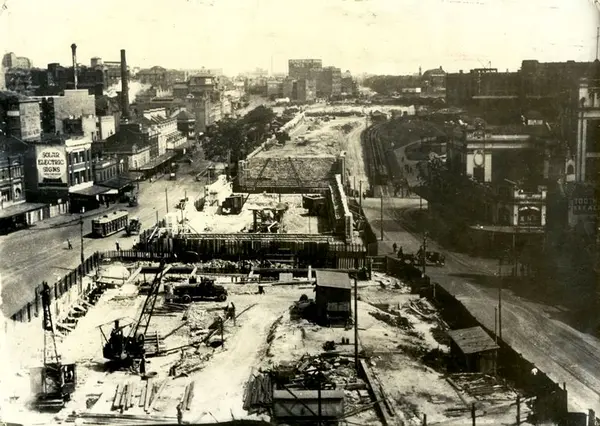
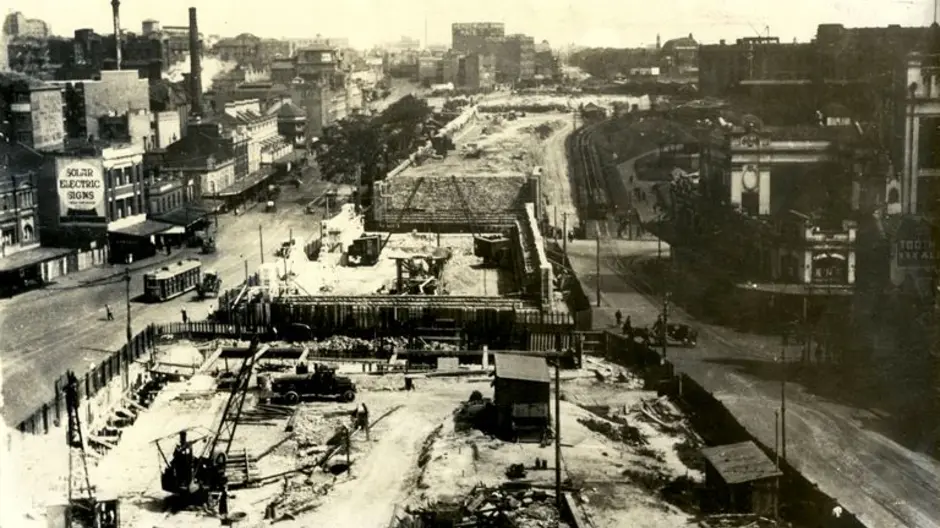
Central
Central Station and City Circle line construction, viewed south from Goulburn Street, c.1925. City of Sydney Archives: 000257
Central
Eddy Avenue, Central Station, 1954. City of Sydney Archives: 044520
Central
Corner of Elizabeth and Chalmers Streets, Surry Hills, 1957. City of Sydney Archives: 044664

Central
Central Station, viewed south along Pitt Street from Barlow Street, 1923. City of Sydney Archives: 051080
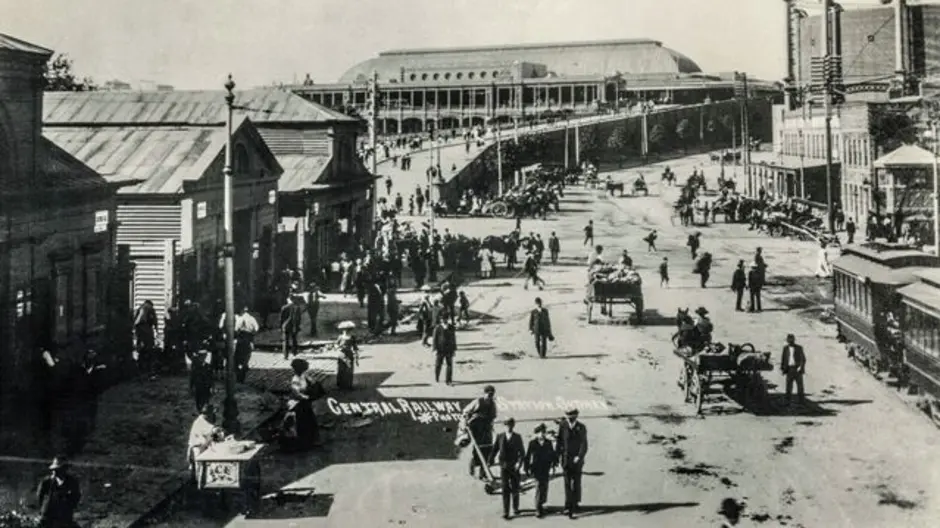
Central
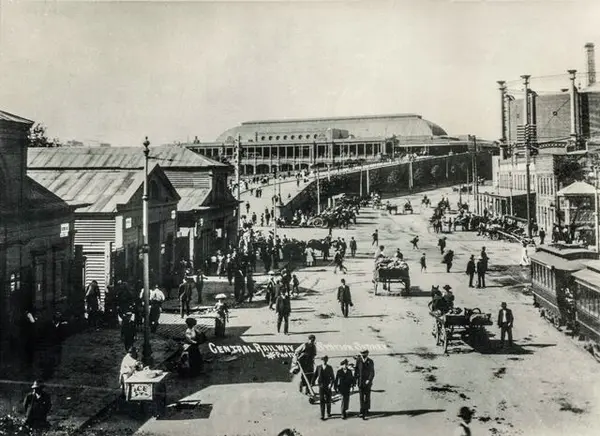
Belmore Markets and Central Station, viewed south from Campbell Street, c.1906. City of Sydney Archives: 053773
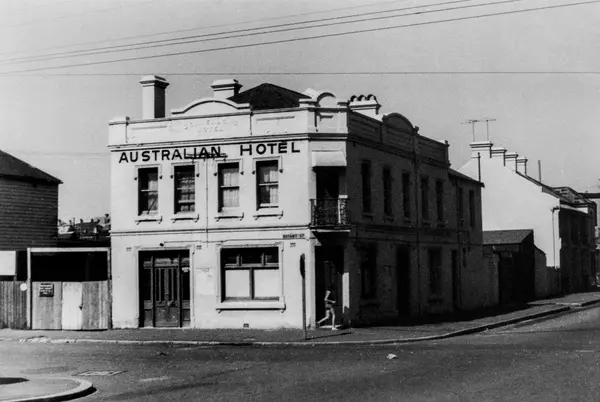
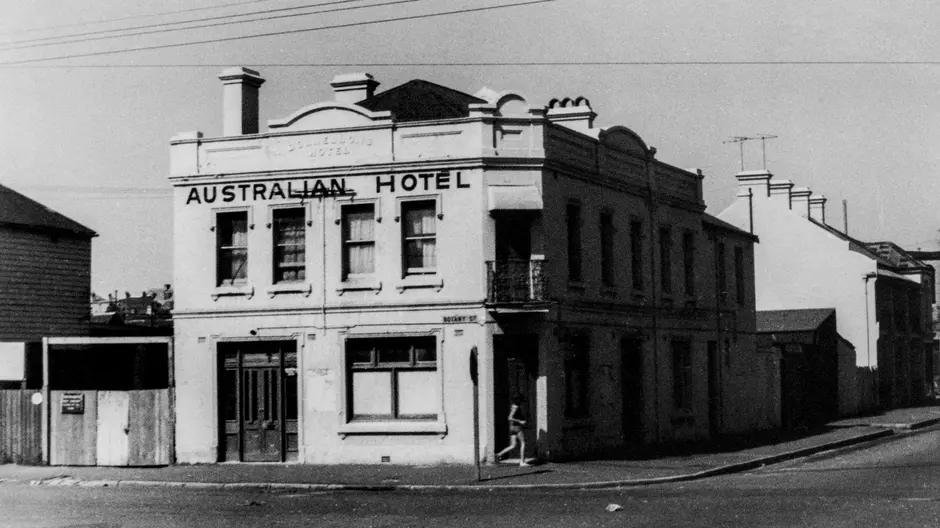
Waterloo
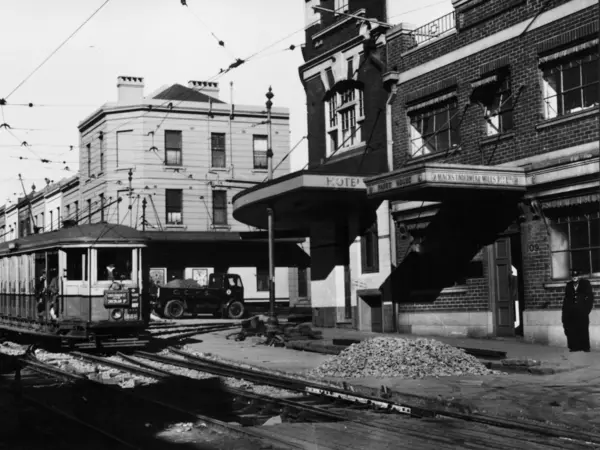
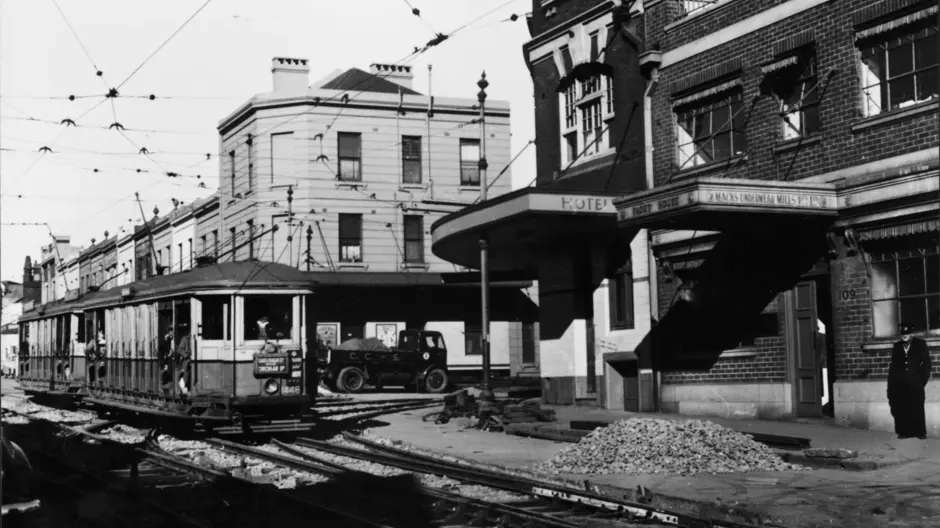
Australian Hotel, north-east corner of Cope and Wellington Streets, c.1950's. Photo courtesy of City of Sydney Archives. Ref #044854.
Waterloo
View north from the corner of Wellington and Cooper Streets, 1961. Photo courtesy of City of Sydney Archives. Ref #032687.
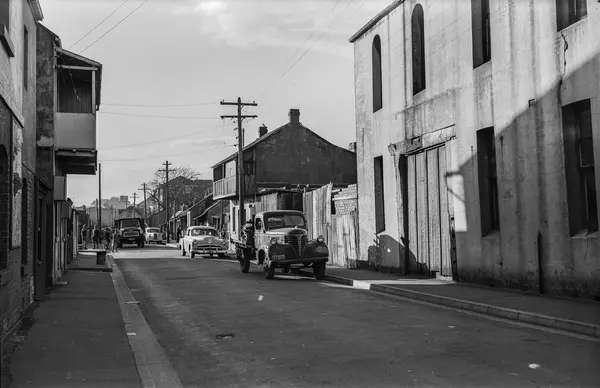
Waterloo
View south from the corner of Botany and Henderson Roads, 1953. Photo courtesy of City of Sydney Archives. Ref #044291.
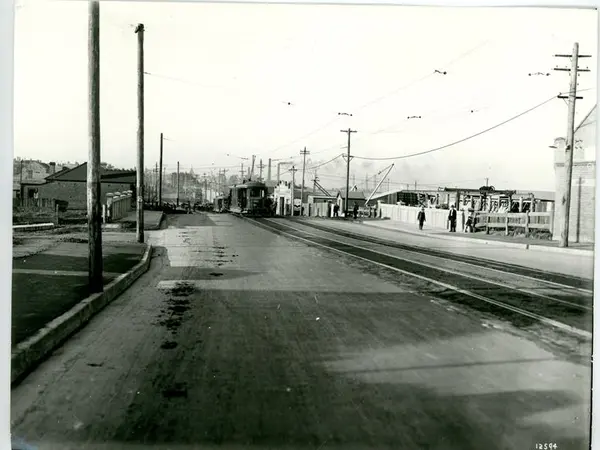
Sydenham
Cooks River Road, Sydenham, 1928. Image Courtesy of Inner West Council Library and History.

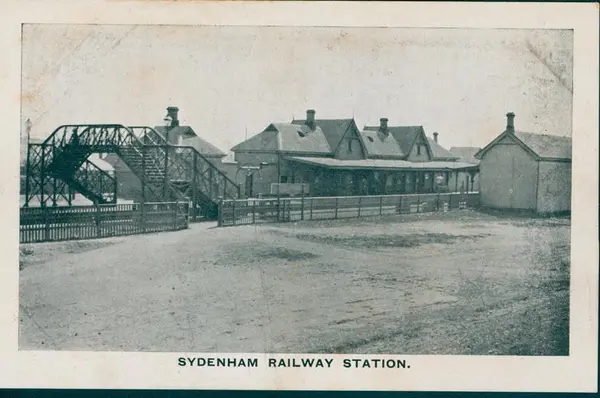
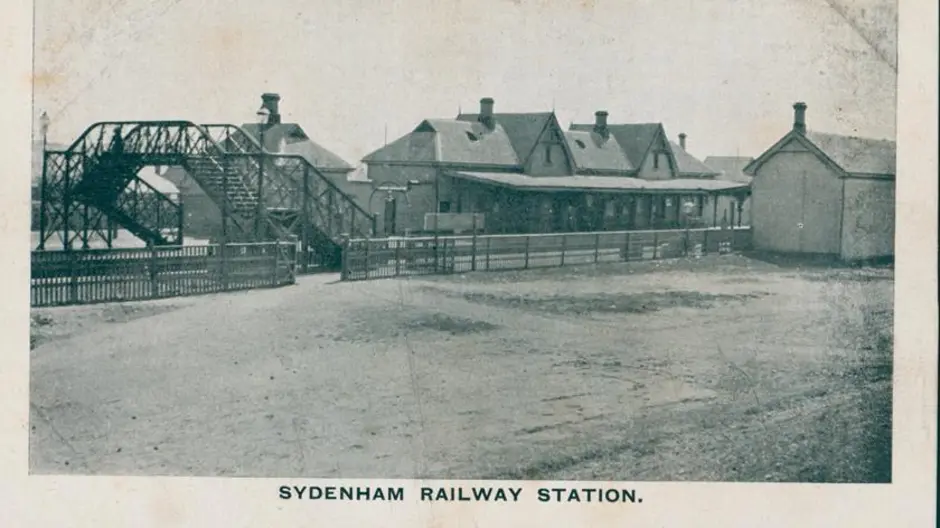
Sydenham
Sydenham Railway Station, c1910. Image Courtesy of Inner West Council Library and History.
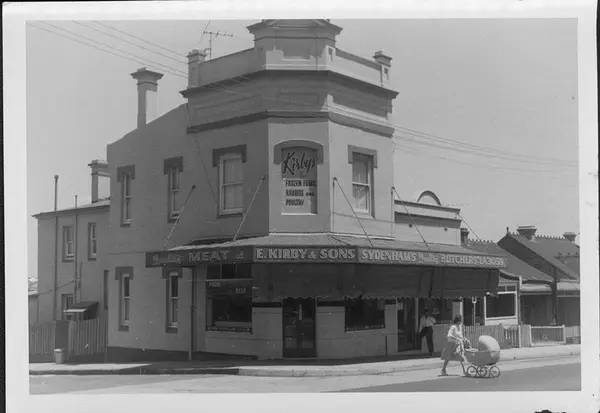
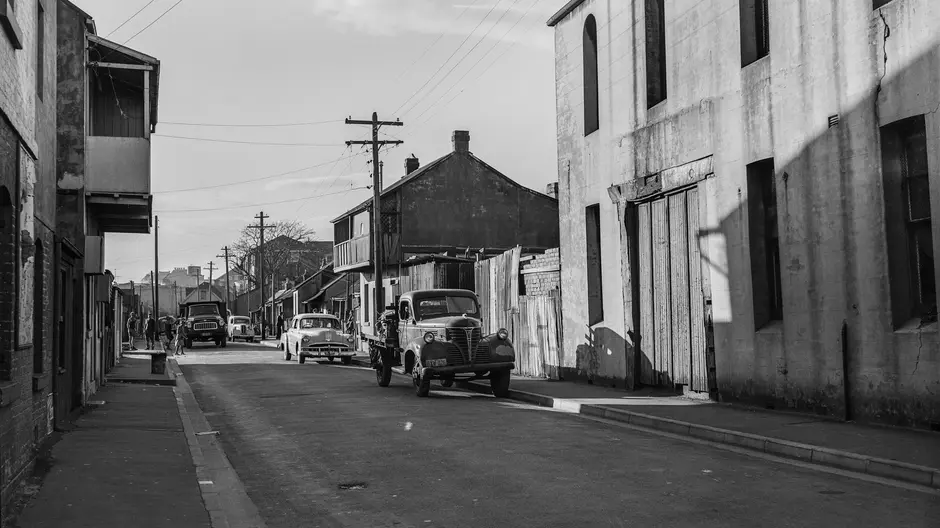
Sydenham
Kirby & Sons corner store, Sydenham, c1950s. Image Courtesy of Inner West Council Library and History.

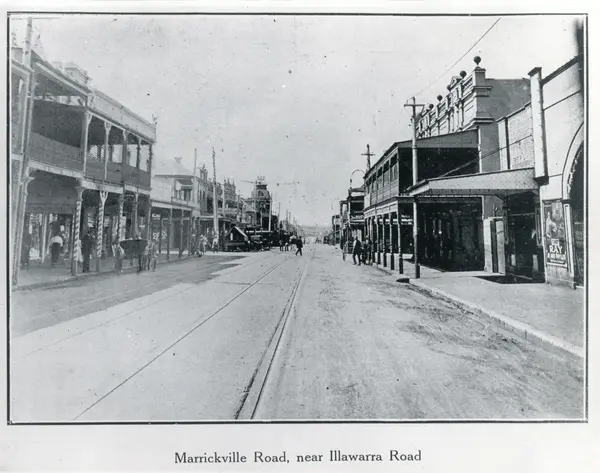
Marrickville
Marrickville Road near Illawarra Road, 1922. Photo courtesy of Inner West Library and History.
Marrickville
Marrickville Shopping Centre on Illawarra Road, 1936. Photo courtesy of Inner West Library and History.
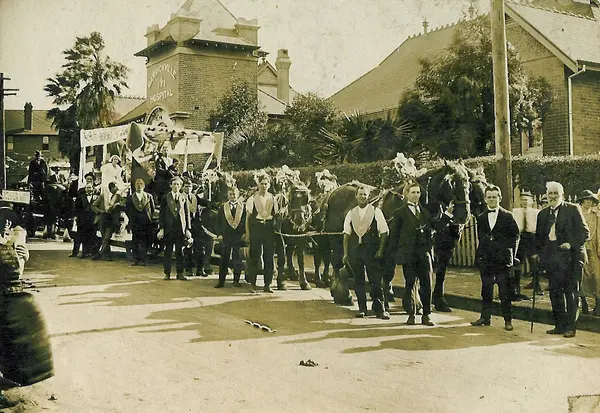
Marrickville
A procession outside Marrickville Hospital in the 1920s. Photo courtesy of Inner West Library and History.
